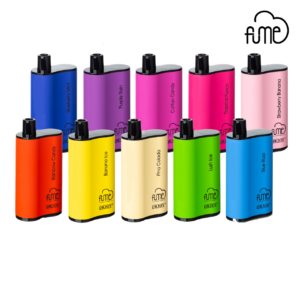
Vaping has become increasingly popular as an alternative to traditional smoking. Whether you’re new to vaping or a seasoned enthusiast, maintaining a clean vape is crucial for optimal performance and flavor. In this guide, we’ll explore the importance of keeping your vape clean and provide step-by-step instructions on how to do so effectively.
Introduction to Vaping
Vaping involves inhaling and exhaling vapor produced by an electronic device called a vape. These devices come in various shapes, sizes, and designs, but they all operate on the same principle: heating a liquid solution to create vapor. The liquid, known as e-juice or vape juice, typically contains nicotine, flavorings, and a base of propylene glycol or vegetable glycerin.
Importance of Keeping Your Vape Clean
Maintaining a clean vape is essential for several reasons:
- Optimal Performance: A clean vape produces better flavor and vapor quality.
- Longevity: Regular cleaning helps prolong the lifespan of your vape.
- Hygiene: Keeping your vape clean prevents the buildup of bacteria and residue.
- Safety: Cleanliness reduces the risk of malfunctions or accidents.
Tools Needed for Cleaning
Before you begin cleaning your vape, gather the necessary tools:
- Cotton swabs or Q-tips
- Isopropyl alcohol (high percentage)
- Warm water
- Paper towels or cloth
- Small brush or toothbrush (soft bristles)
Step-by-Step Guide to Cleaning Your Vape Cleaning the Exterior
- Disconnect the Battery: Turn off your vape device and remove the battery if possible.
- Wipe Down the Exterior: Use a damp cloth or paper towel to clean the outside of the device, removing any dust or residue.
Disassembling the Vape
- Empty the Tank: Dispose of any remaining e-juice in the tank.
- Disassemble the Vape: Carefully take apart the different components of your vape, including the tank, coil, and mouthpiece.
Cleaning the Tank
- Rinse the Tank: Rinse the tank thoroughly with warm water to remove any e-juice residue.
- Soak in Isopropyl Alcohol: Submerge the tank in isopropyl alcohol for 30 minutes to dissolve stubborn buildup.
- Rinse Again: After soaking, rinse the tank once more with warm water and allow it to dry completely.
Cleaning the Coil
- Remove the Coil: Take out the coil from the tank.
- Clean with Alcohol: Soak the coil in isopropyl alcohol for 15-20 minutes, then rinse it with warm water.
- Dry the Coil: Allow the coil to air dry thoroughly before reinserting it into the tank.
Reassembling the Vape
- Reassemble the Components: Put the cleaned tank, coil, and other parts back together carefully.
- Refill the Tank: Fill the tank with fresh e-juice, ensuring it’s not overfilled.
- Prime the Coil: To prevent dry hits, prime the coil by saturating it with e-juice before vaping.
Regular Maintenance Tips
- Clean your vape regularly, ideally once a week or after every flavor change.
- Store your vape in a cool, dry place away from direct sunlight and heat.
- Replace coils and wicks as needed to maintain optimal performance.
- Avoid overfilling the tank, as it can lead to leaks and spills.
Common Mistakes to Avoid
- Using harsh cleaning agents that may damage the vape components.
- Neglecting to dry the components thoroughly before reassembling the vape.
- Disassembling the vape without proper knowledge or instruction, risking damage.
Conclusion
Keeping your vape clean is essential for enjoying a satisfying vaping experience. By following the steps outlined in this guide and practicing regular maintenance, you can ensure that your vape remains in top condition, providing flavorful vapor with every puff.


